Month: April 2020

Fabric Face Mask Making Tutorial

I’m back (as promised) with that mask making tutorial! This is a plan for a double layer mask that fits extremely well. I’ll have some pics of myself wearing it soon. ^.^

And now… let’s just jump into it!

Materials

To make this mask, you’ll need the following:

  • A pretty outer fabric, 100% cotton
  • A soft inner fabric, 100% cotton or silk (I’m using cotton gauze, which is nice and soft against the skin)
  • 1/4” elastic – braided, NOT knit (knit elastic can be scratchy at the back of the ears)

And of course, a sewing machine and thread that matches your fabric.

Recommended Materials and Tools

These items aren’t absolutely necessary, but I recommend having them:

  • A rotary cutter and a rotary cutting mat
  • Cardstock (to print the pattern)
  • A 1/16″ scrapbooking hole punch
  • Plastic twist ties (the easiest way to do the nose wires!)
  • Antibacterial wipes (to make a removable/interchangeable filter.)

Step 1: Prepare patterns

Here are the links to both patterns, or you can view and print the images in this post.

Cut out both patterns.  Take your hole punch, and punch the outer pattern. If you don’t have a hole punch, you can use sharp scissors, and twist to make a hole. For the two spots marked by the nose, poke holes, then cut with scissors so that you have two slits to mark.

Your pattern will look just a bit different than mine in these pictures. I drafted it by hand, but cleaned it up on the computer before uploading it to my site.

Step 2: Cut out

Cut out your inner fabric.  Cut out your outer fabric pattern from your pretty fabric, and mark the dots, and the lines at the top.  You can use a fabric chalk pen, or even a washable marker will work for this step.

Cut out two strips of elastic, as follows, depending on which size mask you wish to make:

  • 7″ – XS
  • 7.5″ – S
  • 8″ – M
  • 8.5″ – L
  • 9″ – XL

I find that most women wear S or M, and men wear M-XL.

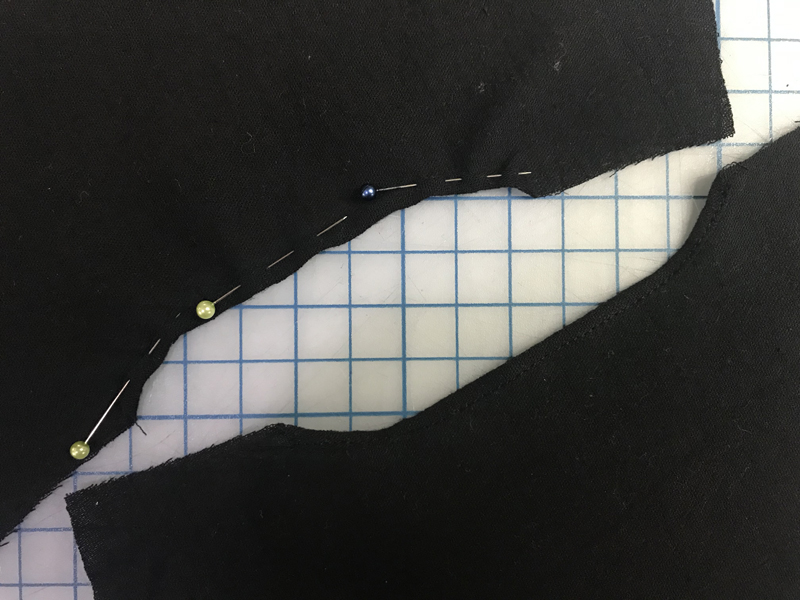
Step 3: Sew nose area

Take your outer fabric, fold in half, and sew the nose seam.  You’ll be sewing from marked line to marked dot in this step.  This helps get the nose portion at a more exact angle.

Take your inner fabric, and fold along the top at 1/8″, twice.  Pin, and sew.  

Open up the nose seam, and press it flat.

Step 4: Chin Darts.

Lay your fabric pieces on top of eachother, right sides out, like so:

Fold the inner fabric so that the first chin dart touches itself, and you can just see the dot you made on the outer fabric.  Fold the outer fabric along the same line in the opposite direction, and pin.  

Put your pin in on the outer fabric side, and pay attention to which direction you put it in, so that you can remove it while you sew!

Repeat this step on the opposite side.

Sew both of these seams – lining up at the 3/8” point on your sewing machine.  I did smaller selvage than the standard 5/8”, to keep the finished mask from being too bulky.  When you’re done, fold the fabric back out again, and topstitch them, like this:

Step 5: Cheek Darts

Repeat Step 4, but with the cheek darts this time, folding first the inner, then the outer fabrics down so that the darts touch, and pinning them, like so:

Sew them, and again topstitch them:

Step 6:  Bottom Edge

Fold at 1/4 inch twice, and then pin the bottom edge of the mask.  Pin the center first, and then the outer edges.  (The resulting seam will be straighter that way.)

I don’t yet have pictures of this step.  I found out that my husband had to wear a mask to his job before I was finished with my first batch of masks, so I had to hurry thru this step and forgot to take photos!  I will do so next time I make them.  🙂

Step 7: Top Edge

The top edge is done just like the bottom, but it’s a bit trickier.  You’ll need to center the twist tie over the nose seam, and pin it in place, starting at the center.  Then when you sew, you’ll need to really muscle it into place to prevent it from sliding out from under the foot while you sew.  If you have a spring action guide foot for your sewing machine (it’s a foot that’s designed to sew things that are really thick on one side, and really thin on the other side) this will make it easy, but that’s kind of a specialty item!  You can do this step with a regular foot by going really slowly and carefully.

(Again, no pictures. I will fix this soon!)

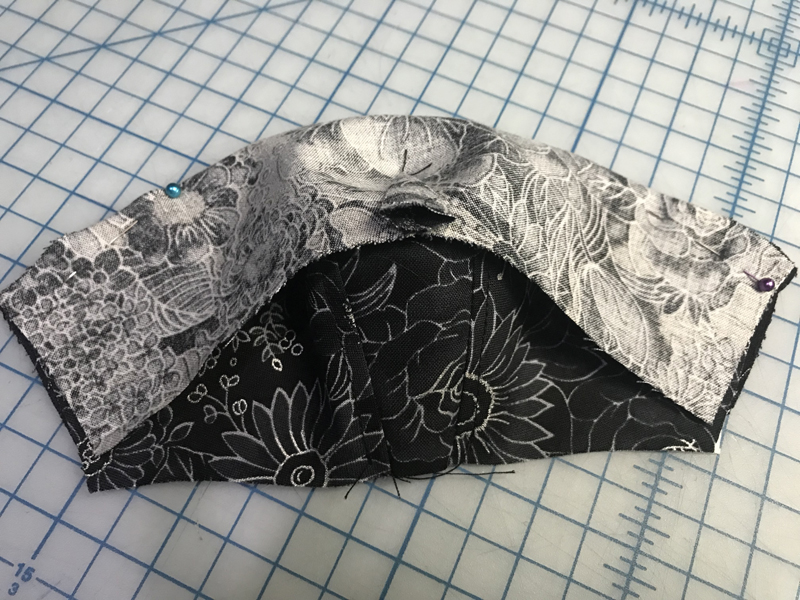
When you have both top and bottom complete, your finished mask will look like this:

There’s a gap between the outer and inner fabric at the nose. This is to create a pocket where you can add a filter. To create your own antibacterial filters – get a pack of skin safe antibacterial wipes. Dry them out, cut them to 4″ x 3.5″ and insert them in the pocket. The wipe will peek out just a tad over your inner fabric, which makes it easier to exchange.

Step 8: Elastic

Next step is to attach the elastic.  To do this, pin it 1/4” from the edge like so:

If you have a serger, the next step is super easy!  Serge both sides, attaching the elastic, and finishing the edge.  Fold your serged seam in, tucking the string ends, and pin like this:

Then sew it down:

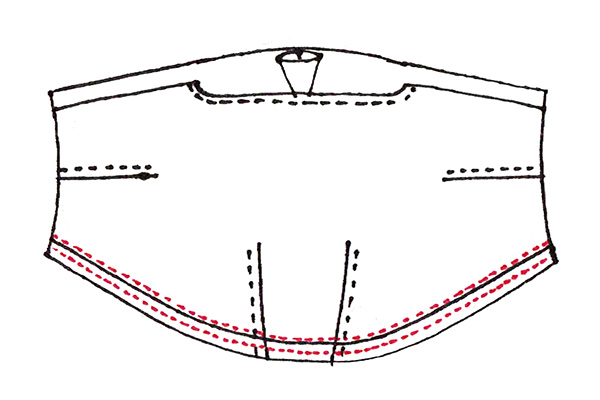
Or without a serger, you’ll pin the elastic exactly as shown above, but instead of serging, the next step is to first sew, then zigzag stitch the elastic, as shown in this sketch:

Fold the edges down twice at 1/4”, and pin, and sew.

And your mask is complete!

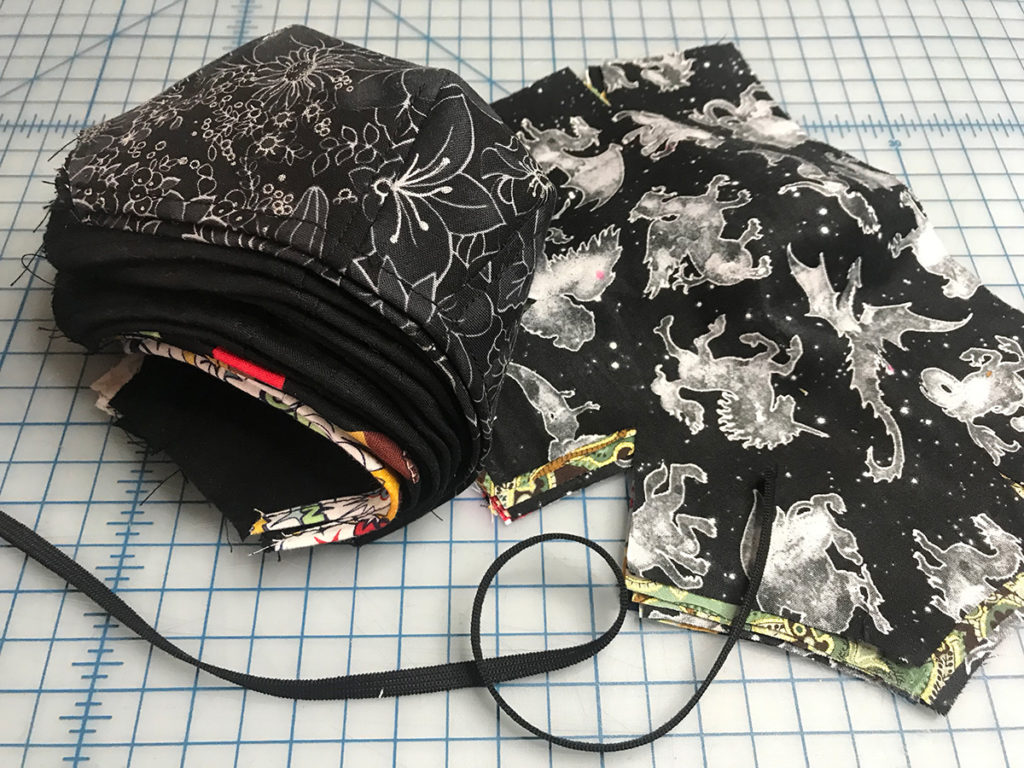
Aaaand finally, great news for those who aren’t interested in sewing any masks – I’m offering these for sale:

They’re very limited, since I can only make a few of them here and there when time allows.  I try to make a few each weekend – so if you click the link but it’s sold out, I’ll be restocking soon.

Fabric Face Masks – Pattern and Tutorial

This is the story of my life: I start a sewing project, plan for how long I believe it will take me, and it takes 3-5 times longer than I expect!

So although I promised via social media to post that mask making tutorial on Sunday, it’s now Monday, and I’m exactly this far on the first batch of masks:

They aren’t quite wearable yet! And since I’m taking pictures while I’m sewing them, that means the tutorial also isn’t quite ready yet.

But I thought I’d get started by posting the pattern and some basic instructions. Real tutorial coming next week!

I made this mask pattern myself. I didn’t intend to – I figured there would be a perfectly acceptable mask pattern online. I even downloaded a couple, and was like – no this isn’t going to fit, no that’s not gonna fit. LOL, who would’ve guessed, I’m too picky to use patterns made by other people. 😛

My pattern is completely unique in that the fit portion is done with darts. There are two darts for the chin, one dark for each cheek, and a dart over the nose. If you do a wire over the nose, there is literally zero gap anywhere with this mask, which is typically the biggest safety problem with homemade masks.

And I feel I should insert the obligatory disclaimer – this is not a medical mask, and it won’t protect from coronavirus like an N95 mask does. However, if you just want something to wear to the store, this style should work absolutely perfect for you.

To troubleshoot my pattern, I made a batch of 10 of them and had my husband hand them out at work and instructed him to have people try them on, then have every member of their family try them on. The pattern I’m sharing below will fit older teenager to adult. To adjust to fit larger or smaller within those ranges, you only need to lengthen/shorten the straps.

Here are the pattern pieces:

I included a box around the actual mask pattern so you can make sure your printer is printing the correct size! The box should be 8 x 10 inches.

If you’re an experienced seamstress, you might be able to make these just from this pattern. For everyone else, there will be a real tutorial coming this weekend!

Sassy in Red Saloon Girl Costume

It just so happens that my designs make the best stinking saloon girl costume… ever! 😉

Red Victorian Saloon Girl Costume

But getting saloon girl photos is rather difficult. I love outdoor photo spots, and there’s nothing near me that looks Wild West! Here in New England, we’ve got a ton of amazing natural scenery. There are spots that are perfect for woodland fantasy, nearly every historical era (while we don’t have in actual historical castles, we have reproductions!), amazingly creepy Halloween spots, gorgeous gardens, and more! But deserts and that wind-and-sun-weathered ghost town look is something you don’t really find out here.

Victorian Saloon Girl Costume
Saloon Girl Bustle Dress

These photos are snapped at Wilcox Park in Westerly RI. There’s a cute caretaker’s cottage there with a front porch that’s painted brick red. It’s way too much lush green for a true Victorian Wild West look – but I had to work with what I had!

Victorian Saloon Girl Costume

And the weathered boards beneath my feet and the painted Victorian-era wooden porch at least look saloon-ish. 🙂

Saloon Girl Fascinator Closeup

Usually I’m wearing my sister’s jewelry – but this time, we failed to coordinate before the shoot. So I whipped up this choker necklace with some hat and crown making supplies I had lying around. It was safety pinned together behind my neck! I think I’m going to turn it into an amazing cloak fastening later this year. ^.^

And here’s my absolute favorite photo of the day – totally getting into character in this shot!

Sassy Red Saloon Girl Costume

This set is going to be one of my first designs that I can offer in all sizes – including plus sizes! I started a big batch of the skirts just before everything went crazy – and I had to prioritize everything else in life. Once things slow down, I hope to be able to complete them and add them into my store. There’s also just one left from the previous batch (a size Medium) in my Etsy shop.

Unicorn and Elven Lady Coloring Page

For this weeks coloring page, I again sat down with sketchpad, pencil, and pens and let my imagination take me where it wanted. I wound up with this Elven Lady and unicorn!

Unicorns are my sisters favorite. I told her that was what the coloring page is going to be this week and her response was “OK, where is it? Hurry up and finish it already!”

When I went to draw this, I realized – wow, it’s been at least 15 years since I’ve drawn a horse. And I was picky about the exact direction and pose of my unicorn. So I had look up about 14 horses on Google images, and use them all to figure out how to draw the horse in this exact position! I’m quite happy with how Franken-unicorn turned out. 😉

Here is the printable coloring page:

Dragon Queen Adult Coloring Page

I sat down with my sketch pad with the goal of drawing an adult coloring page featuring a Steampunk fairy… but then this happened!

Lol, I’m not sure if I had Game of Thrones on the brain, or if I just wanted to do something straight from my imagination, and a little less practical.

As I was penning in this drawing, an idea of the fantasy world in the picture was forming in my head.  The lady is training the baby dragon in the photo.  Eventually it will grow up (the size of the ones flying in the distance) and she’ll be able to ride it.  At least in my head, it’s a land where castles are built right up into the sky, and the people all ride dragons.  I’d very much like to run away to this place, given what’s going on in the real world right now!

I could make the dress my Dragon Lady is wearing in the picture.  (I can make almost anything, lol!)  But if I did, it wouldn’t go very well with the rest of my designs – since I specialize in corset dresses.  So my “Dragon Queen” gown idea will probably remain in my imagination.

Although I have to say – I would LOVE to make that belt and that shoulder piece.  While I was drawing it, I was thinking about how I’d combine scale mail, and really big/amazing filigree pieces, and chandelier drops to make it – and I want to create it and watch it take shape!

Here is the printable coloring page:

Dragon Queen Coloring Page

Burgundy Steampunk Wedding Dress

One of my resolutions for 2019 was: make more dresses with hoop skirts!  So on that note, allow me to introduce this Steampunk wedding dress!

Over the years damask has been my most popular fabric, and I love stripes too. I combined both of them into this design.

Burgundy Steampunk Wedding Dress

I also went with a skirt and shrug design that are very pretty, but easier to make. As a result, I’ll be able to sell this set for a fairly reasonable price, considering how fancy it looks!

Burgundy Steampunk Wedding Dress

I don’t have this set available quite yet, but I’ll update this post when I do.

Burgundy Steampunk Wedding Dress

As always, jewelry by my sister, Fantastical Treasures. You can see more of her work on her website and in her etsy shop.

I love making things that match! The hat is a mini-fedora style tilt hat, that looks nice with any of my Steampunk Victorian gown designs.

Burgundy Steampunk Wedding Dress

Thank you for browsing!

Burgundy Steampunk Wedding Dress
Made-To-Order Information Am I out of your size, or do you need a size other than what's listed? If you catch me at the right time, I offer this item made-to-order! It's not available made-to-order right now, but enter your email below, and I'll reach out to you when it is: