Introducing: Choose your color hairpieces!

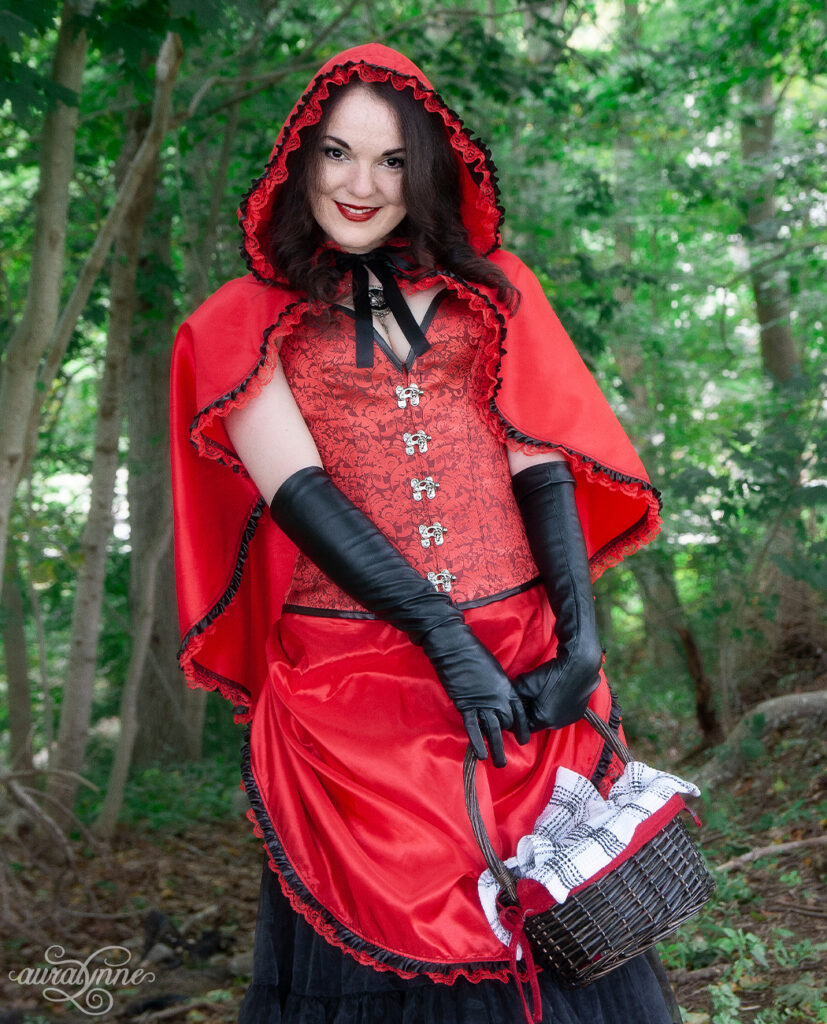
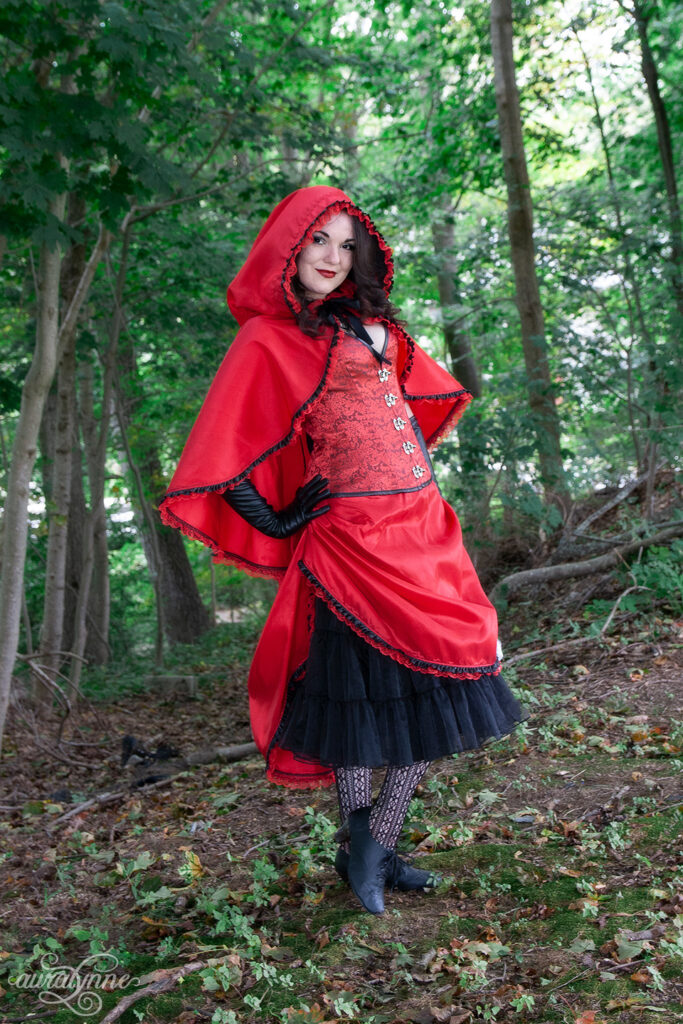
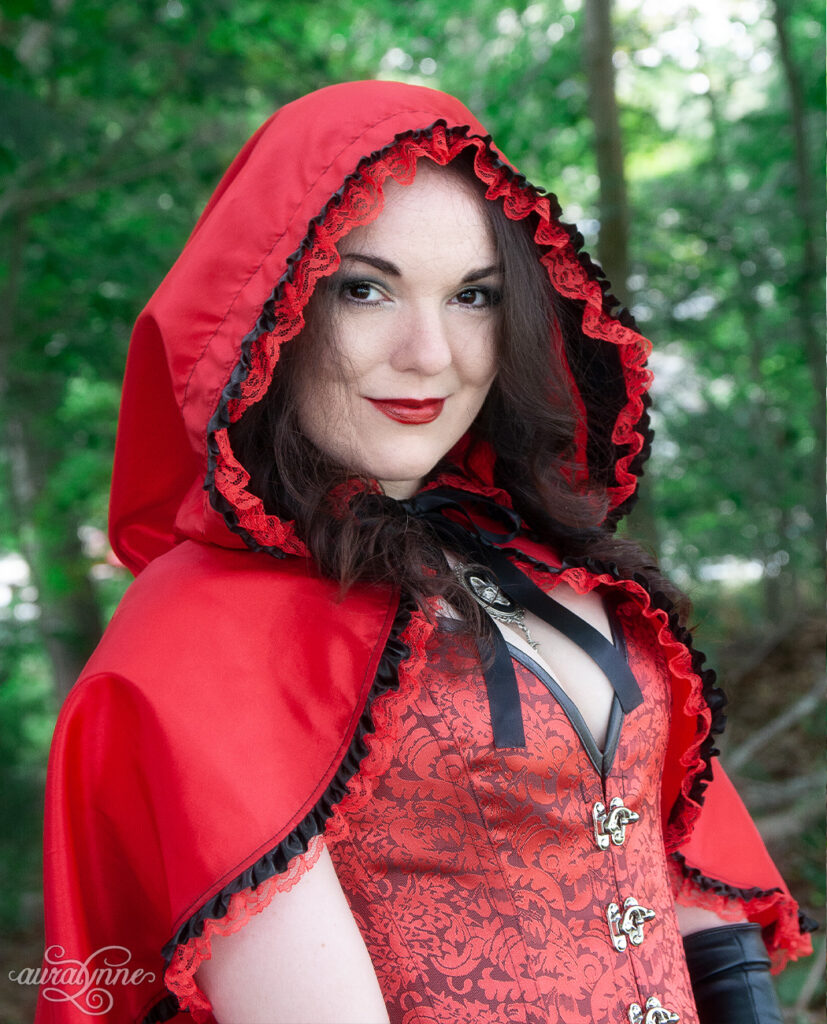
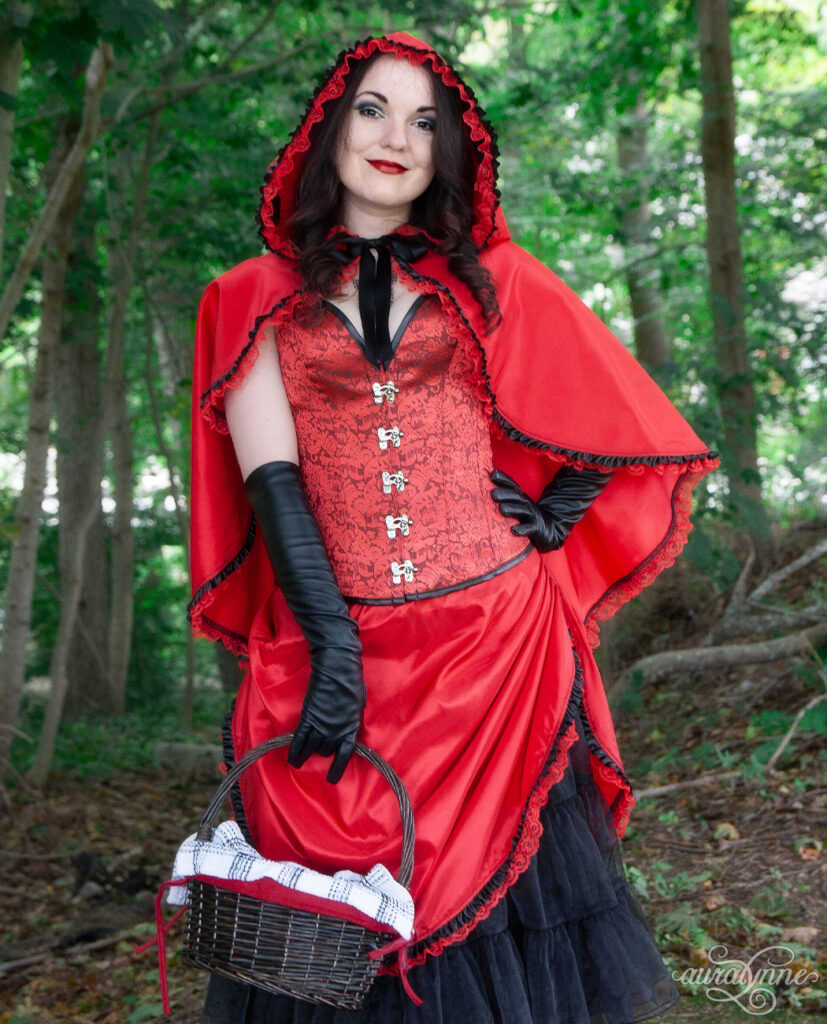
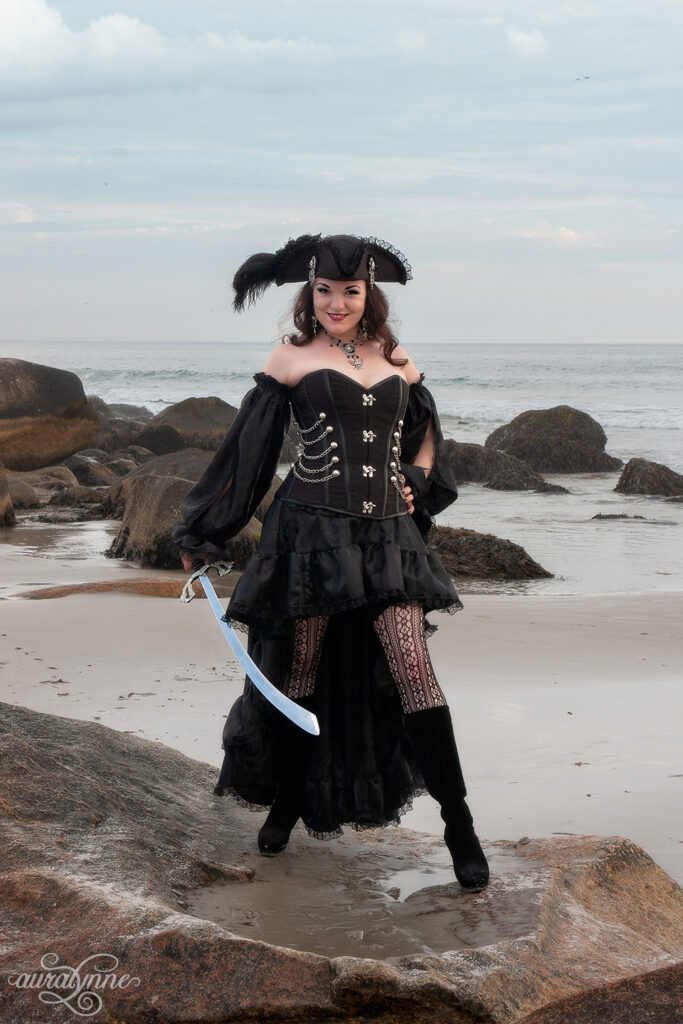
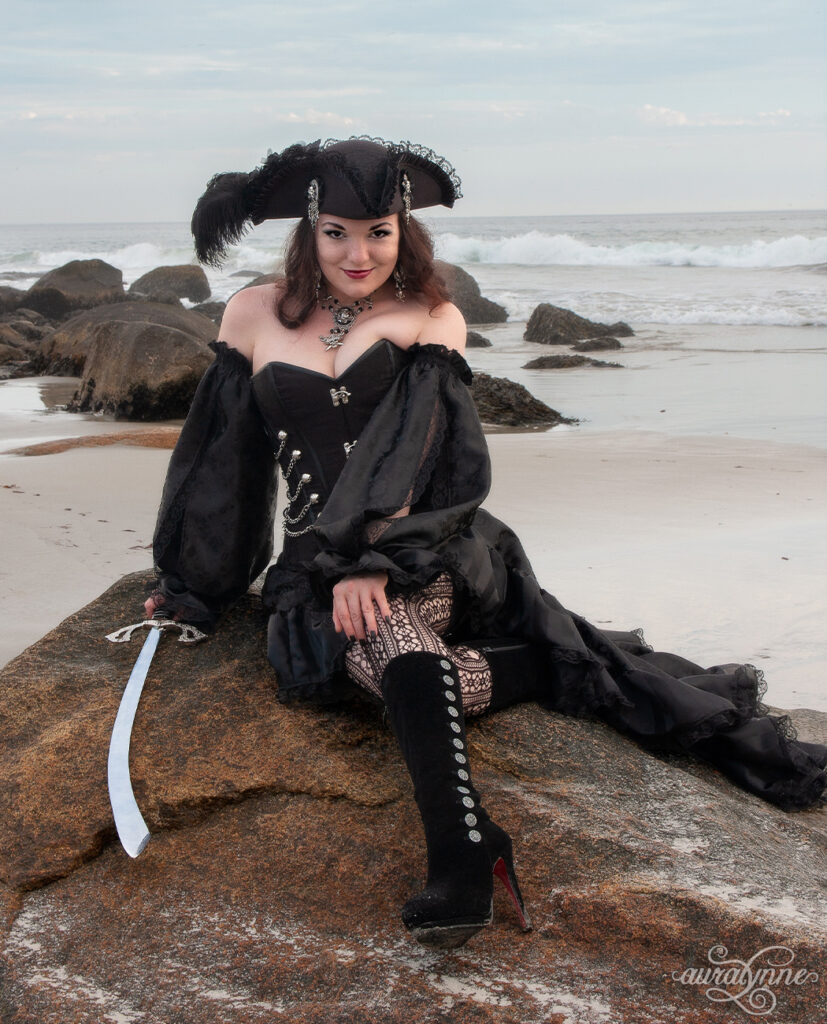
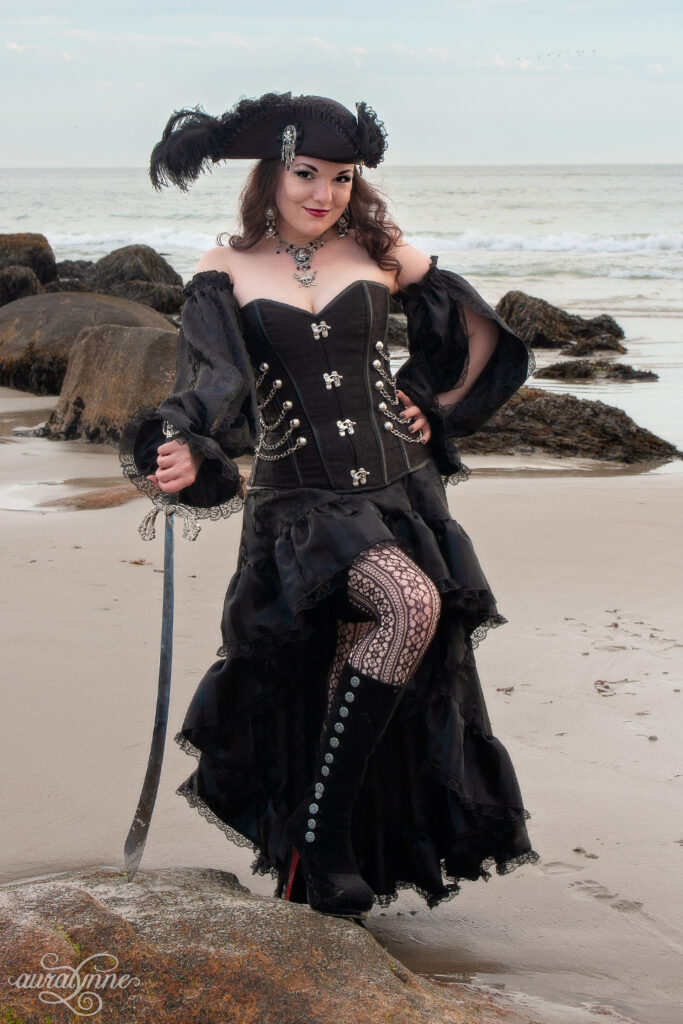
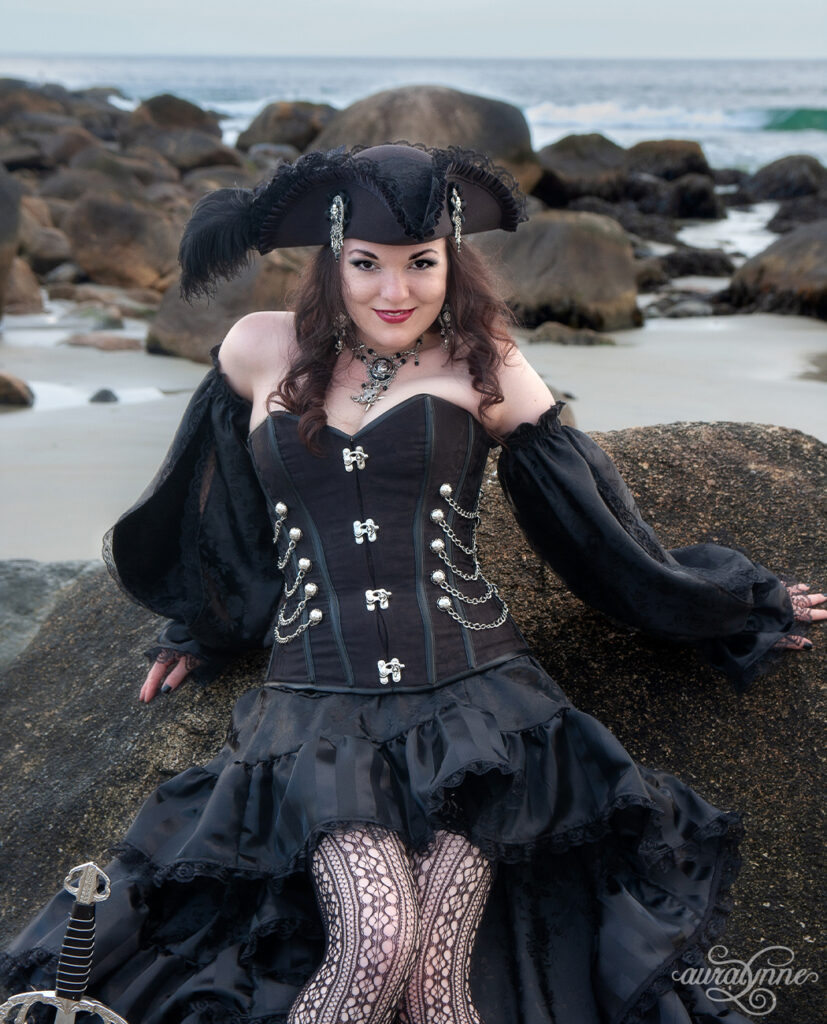
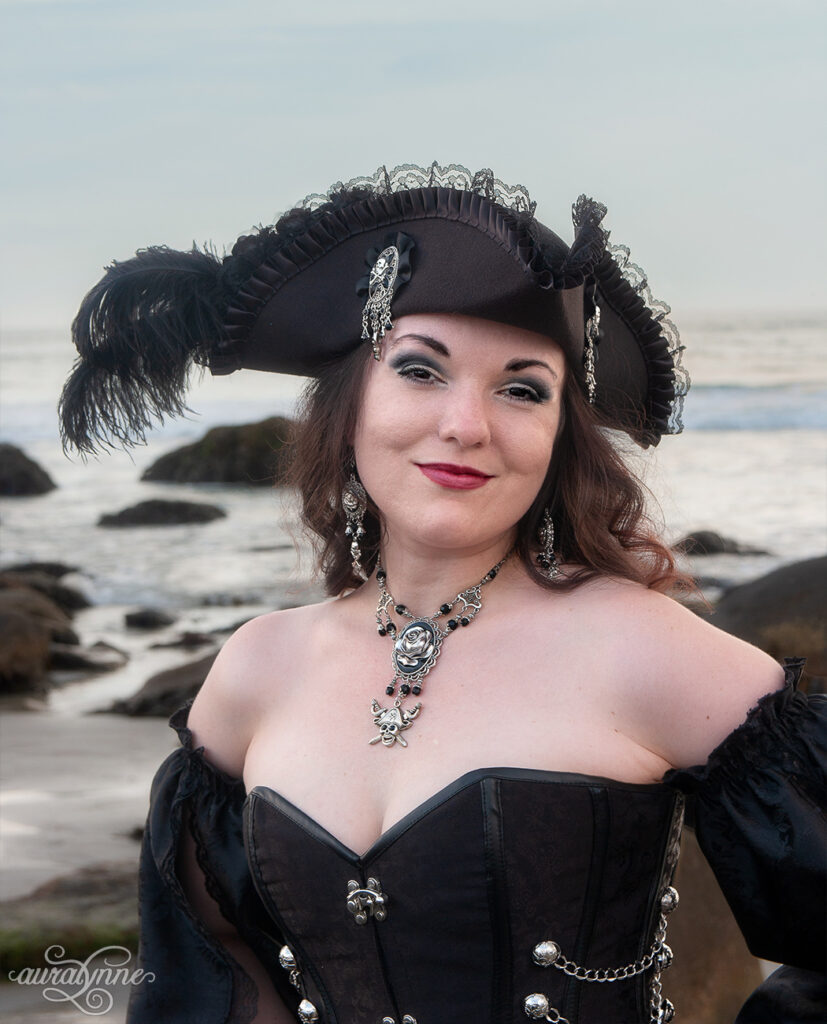
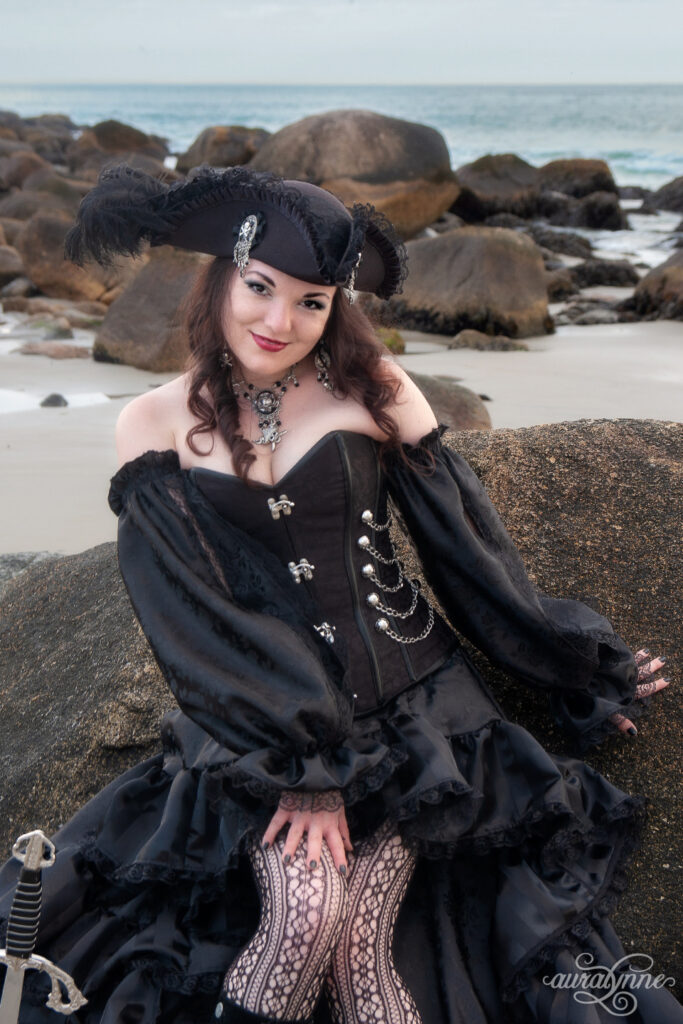
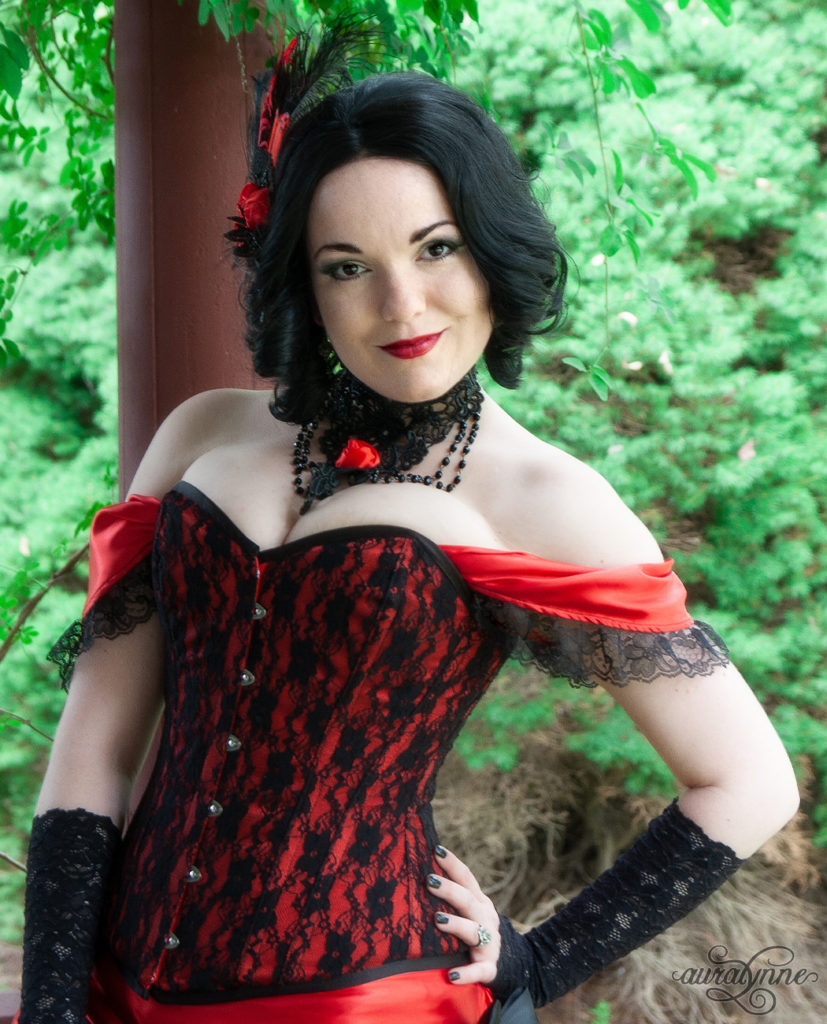
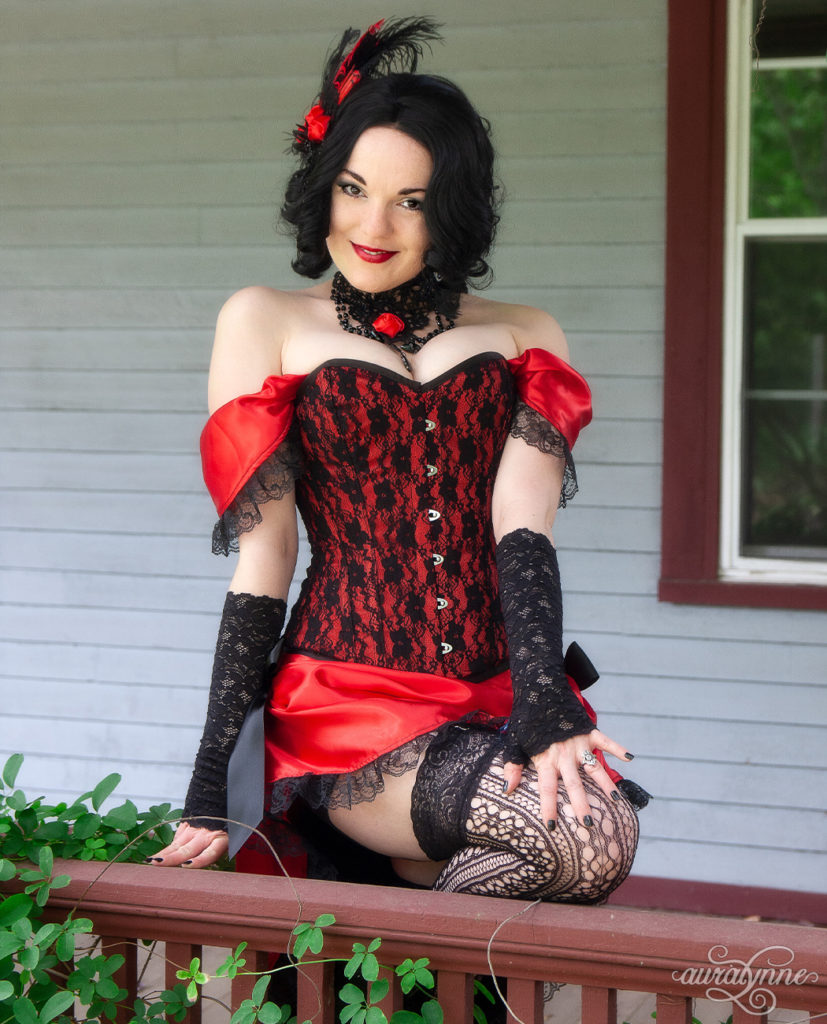
I sold this outfit to a customer recently:

And along with it she wrote me a cute little note. She had searched my shop, and couldn’t find anything, but did I maybe have some kind of matching hair piece?  She really wanted something – anything – to match her new look.

I searched my stock room – and predictably, I was sold out of every single piece in burgundy. I’m not sure if it’s my luck, or lack of organization, but despite the fact that making things that match is literally my favorite part of what I do, I fail at having matching looks ready to ship pretty often!

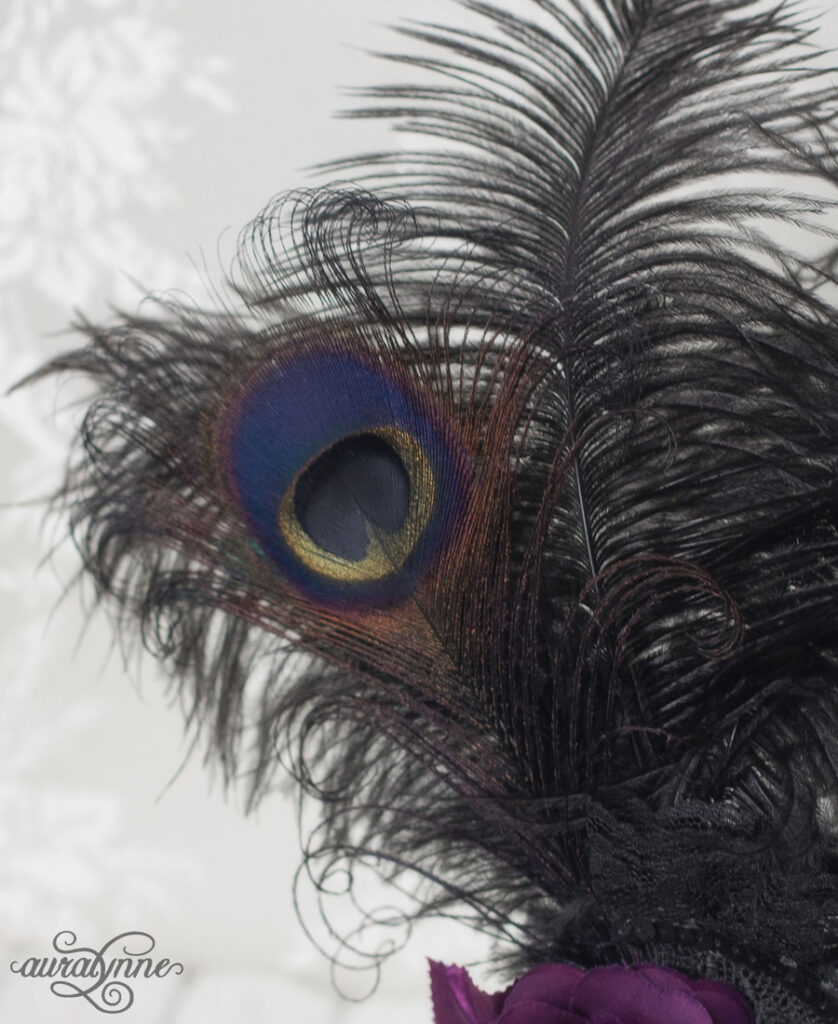
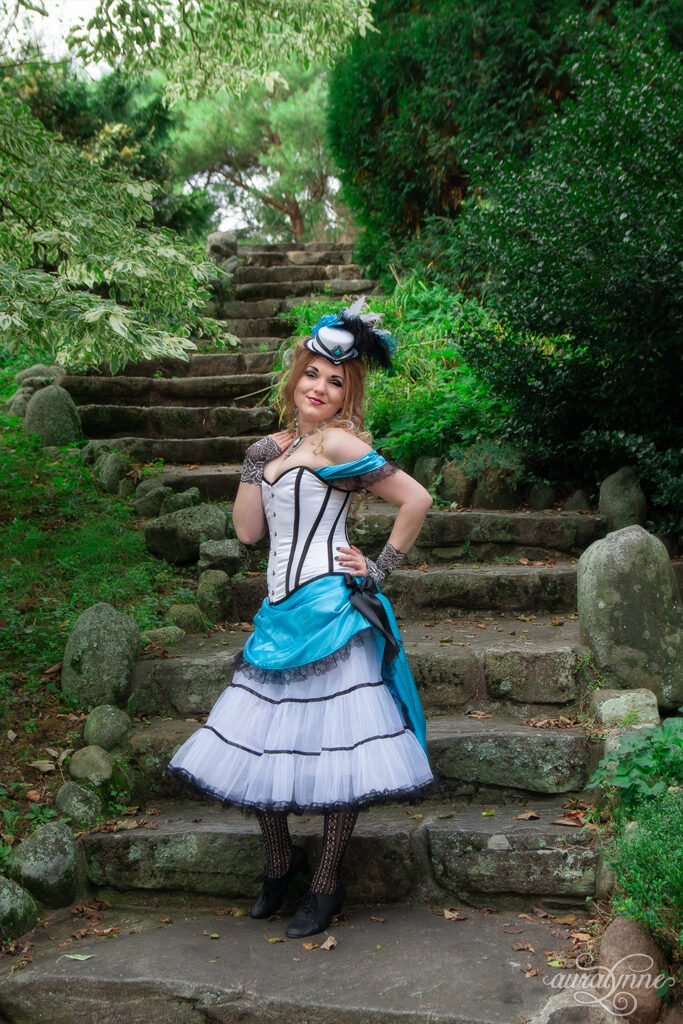
This is a piece I made (and sold) a couple years ago: 

If you take a peacock feather, and first bleach it to remove most of the color, then dye it black, you get that pretty dark iridescent look.  I selected it for this piece because some of the iridescence is close to the deep plum color of the rose.

After reading my customer’s note, I thought of that piece from years ago, and wished I had made more.  I could have easily pulled off the plum rose and replaced it with a burgundy one to match her dress!

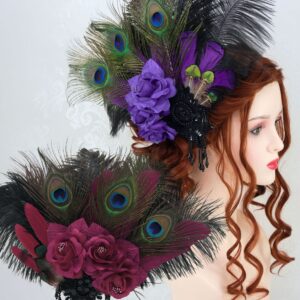
And so, a new idea was born:

The new version of the fascinator is bigger than the old.  I don’t know about you – but when I think Saloon girl hairpiece, I want big, and over the top!  So I did a full “fan” of 5 ostrich plumes, and accented each with three black peacock feathers.

The roses come in a ton of colors – but for starters, I’m offering the 6 shown in the above photo.

And me being me, and never short on ideas (haha too many to be practical most of the time!) I also have plans to take this same idea and turn it into a crown!

Back in June I posted this photo on Facebook:

And one of the comments said “Purple and black!”

I thought, hmmm, could I make it in purple and black?  The beads and rhinestones, I couldn’t do in purple (they likely wouldn’t match eachother!) but I can get the roses in several gorgeous shades of purple.

Adding the roses is the last step to making the crowns too – and it’s a quick, easy step that I often wait on since the crowns can be stored in a much more space-saving way before I add them.

But to do this, I will need to purchase more satin roses from my supplier – so far I only have black, white, ivory and red.

And I’d really want to make sure the colors match my fabric too – so that would mean trying to see if I can negotiate to get them to use ribbon I provide to make the roses too…

So many ideas, so little time!

But the fascinator hairpiece is available right now. If you’re in the US and you’re seeing this post right away, you can enter to win your very own here!

Or, I offer the piece for sale in my shop:

Victorian Little Red Riding Hood Costume

The dress I’m going to share today isn’t really a new design – it’s more of a remix!

I like to make these occasionally to show how versatile my designs actually are.

My old design was a red steampunk costume, but with this one, I switched petticoats, and added a cloak to turn it into a “Little Red Riding Hood” costume.

In your opinion, what makes the best cloak?  I think for me, #1 priority is a nice roomy hood:

I also prefer a cloak that is the correct size to sit perfectly flat on the shoulders, and then fall all around in a circular fashion.  As it turns out, that’s about 3/4 of a circle of fabric.

This is actually a capelet – or a short cloak.  I made it that way so it wouldn’t cover the poofs in the back of the skirt.

And it ties with a simple ribbon bow in the front.

You know how hoods often slide off your head?  I have a little trick I use to fix that problem when I make a hood.  There’s a strip of velvet on the inside of the hood.  The velvet both adds a bit of weight to the front of the hood, and helps it to grip your hair.

This is a limited edition costume.  The corset has been discontinued by my supplier.  I have a few still available, and I plan to keep making skirts and cloaks to match them until I run out.

You can purchase your own look in my etsy shop.

Mix and Matchable Skirts

I’m working on a new section on my website to help with ordering custom wedding dresses and costumes from me.  So it makes sense to have a list of everything I can make – every skirt design and jacket design.  And I kid not, I’ve designed and drafted so many beautiful skirt patterns over the years that I have difficulty remembering them all!

One thing that makes it complicated is my skirts are interchangeable.  I have front patterns and back patterns – and you can combine different fronts with different backs for a ton of unique styles.  For instance, here are two fronts, and two backs, and depending on which front and which back you choose, you wind up with four different skirts!

And of course, even more looks are possible if you switch out the petticoat!

Each time I’ve tried to list all my skirts, I’ve missed a few cute combinations.  And I definitely don’t want to miss anything in the new custom orders section for my website.  So I cut up a bunch of cardstock, did some reeeeeally quick sketches, and made cards for every skirt pattern I’ve drafted so far (or am in the process of drafting).

And then I looked at all of them and thought geez, no wonder why I’m getting confused!

Once you start combining all these patterns with eachother, it makes quite the plethora of available styles!  So I’m sorting all my skirt styles into “Silhouettes”.

And here they are!

I think because I’m a Late-Victorian-Era obsessed nut, this one’s my go-to.  When I design new things, I practically have to slap my muse to not design a new bustle skirt!  So there have been a ton of bustle skirts over the years.

Sometimes I like to cosplay a younger character – or an adult character with a cutesy personality, and when I do, I definitely want a petticoat skirt. 

High low skirts are awesome because they look 100% amazing worn by themselves.  If you want a cute look but prefer not to have to mess with petticoats, bustles, or other undergarments, high low is the way to go.

Apparently I need to actually make a few Flowy skirts!  Lol when I went looking for pictures of them, I realized that none made it past the sketch point.  Flowy skirts are based on a full circle’s worth of fabric, and they fall smoothly past the hips.  They are supremely twirl-able, and – well, flowy!

Sometimes, you just want to go all out.  The costume equivalent to this is wearing a hoop skirt!  Many of my skirts have an alternate version to the pattern that’s intended to wear over hoops.  And I have a few dedicated hoop skirt patterns as well.

And then that is only the tip of the iceberg, since every silhouette has multiple skirt patterns, and usually there are multiple looks you can create with a single skirt too, depending on what you wear it with.  For instance, “Vintage Diva” my most popular skirt, can be worn in no less than 6 ways!

Lol, I fail at making/designing anything simple…

Which could explain why I always run late with new designs! I started writing and organizing pictures for this new section of my website way back in June! And I expected to have it complete by mid-July.

It’s September now, and I believe I’m about halfway done. Sigh.

I planned to do the writing/organizing part in all the “free time” I thought I’d have once Virtual School ended, but it hasn’t quite worked out that way!

But until I finish, I thought you all might enjoy this little preview. 🙂

Black and Silver Steampunk Pirate Costume

This costume has been in the back of my head for a very long time.

The actual dress design is from all the way back in 2013!

Pretty much since the day I made it, I thought – wow, this would make a really cool pirate costume!  But I never got around to actually completing all the accessories to turn it into a pirate costume, and take the photos.

Then last year I designed these adorable sleeves.  And after I made the prototype pair and saw just how wonderfully pirate-y they look, I decided it’s time to take that photoshoot I’ve been thinking of for so long.

It also helped that when I placed my last order of pirate hat bases, there was a single hat that was randomly larger than the rest – and therefore it fit my big head, lol.

As always – jewelry by my sister – well, mostly, this time!  I called her before setting up this shoot, and she had sold out of every pirate set she makes with no time to make a new one for the photoshoot.  So I asked her if she could instead just bring me a few pirate charms.

This jewelry was her Christmas present to me in 2018.  It originally contained gothic medieval dagger charms.  But I thought, the steel roses thing would be awesome for a lady pirate too – “Rose of the Sea” or something like that.  So I switched them out for the photoshoot.

Lol, we posted a photo of the jewelry on our social media, and she sold one as a custom order that same day!  So it’s become a permanent part of her collection.  🙂

And this pirate set will most definitely be a permanent part of my own collection.  You can purchase your own set here!

Gothic Victorian Alice in Wonderland Costume

I quite love how this Alice in wonderland costume turned out!

It’s really an updated version of this design from 2018.  I loved and still love the original look – but I wanted to make a couple tweaks that would reduce the time it takes me to make it – and thus make the design more affordable to all my lovely customers! ^.^

The skirt is my ever-popular “Vintage Diva” skirt – worn over this adorable petticoat that I found at a wedding wholesaler.

Normally Alice wears a headband (and last time I made one) but this time, I wanted to try something a little different, so I made a hat!

And of course, my sister made some gorgeous matching jewelry for me.  I love all the little Alice in Wonderland Tea Party charms!

We took these photos at Wilcox Park (very near me in Westerly, RI.)  It’s a Victorian era walking park – so there is a lot of scenery there that meshes quite well with my designs.

Haha I can’t seem to make one Alice costume without getting ideas for another!  Or another two!  So I thought I’d close this post by sharing a couple sketches, to give you a little preview of what I’ll most likely make next time I get a hankering for Wonderland. 

The differences are very subtle as black and white sketches – but the fabrics I have in mind for them will make each one unique!  The one on the left would be made from similar fabrics as the alice costume from this photoshoot, and a corset with the black accents, but also with silver buckles for a more Steampunk look.  The one on the right would be more Steampunk – with bronze buckle accents, and all blue and white or ivory.

I’m unsure which one I want to make first.  Which would you prefer?  🙂

Exciting news about Custom Wedding Dresses!

This is totally silly. But I like to think of all the things I’ve made over the years as little bits of me, wandering around, spreading cheer and adding a bit of pretty to the scenery…

At Steampunk festivals, renaissance faires, pirate festivals, and more!

And when I make new things, I always daydream a bit.  Who will have the pretty thing that I’m hand crafting right now?  Where will they wear it?  I think of how it feels when you’re out in public wearing something amazing, and someone stops you and says “OMG I love your costume!” and I smile.

But now, all those chances to prance around in costume have disappeared.  I hope they’re returning soon.  I hope that all the amazing vendors that support these events will weather the storm, and be able to jump back in once things open back up.  But to expect that everything will return exactly to normal once this is over is – well, a bit delusional.

Pre-pandemic, I was heading in a direction that I’m not sure about now!  I was going to steer away from weddings in favor of ready-to-ship costumes.  And now, after having several months where brides were my only customers, I’m second guessing that decision.

I’ll be frank.  I love making custom wedding dresses. I discontinued them only for practical reasons.  The main one being that I haven’t been able to figure out how to earn a livable wage while making them!

Why?  A couple reasons.  One: I am an eternal optimist.  It’s a great thing when it comes to my mood – but not so great when it comes to estimating sewing time on a new design (or even a design that I haven’t made a zillion times yet.)

Two: I am an exacting perfectionist.  Lol again, it’s amazing for the quality of my work!  But not so great for custom sewing.  The slightest mistake (even one a customer would never notice) will be unstitched, and re-sewn.  It’s even fairly common for me to throw out a custom project (or sell it in my store) and start over again to be sure the one I send to the customer is 120% perfect.

You can probably imagine that this results in amazing, gorgeous gowns, made unsustainably!

But I need to (and I want to) offer them again.  I know that my over-the-top fancy dresses are what many of you love most about my designs!  And when someone tells me that I’ve made their dreams come true (in making the perfect dress for their special day) it really is the BEST feeling.

So, let me announce (drumroll please):

But there are a couple caveats.  The first is that I won’t be able to accept every request that comes my way.  Custom gowns will be very limited – to the tune of exactly one per month!  I am only one insanely perfectionistic seamstress, after all.

The second caveat is: Custom gowns will cost more than they used to.  I think many of you will still find them to be awesomely affordable – I tend to design things with a high pretty-to-cost ratio!

And that’s all I can say for now!  I’ve gotten rather backed up in my sewing schedule over the pandemic, so I’m currently booked thru the beginning of August.  I should hopefully have more information on custom made gowns available by mid July.

If you’d like to be the first to know about custom made gown availability, please sign up for my newsletter at the bottom of this page.

Paint the Roses Red Adult Coloring Page

My Queen of Hearts coloring page is finished! I think this might be my favorite one so far!

The gown she’s wearing is DEFINITELY my favorite. It was not the one I intended to draw, though, lol! This is a design that keeps making its way into my “doodling zone” – lol the margins of the pages of my notebook while I’m working on something else!

Those V-shaped bits of fabric at her waist are a detail I WANT to make a pattern for and add to a dress jacket! But it’s precisely the sort of insanely-time-consuming project that I haven’t got the ability to do right now (which is probably precisely why I want to so badly!)

I had the dress I had intended to have her wearing sketched in… And I was pouting about it. It’s a practical design – something I already have the pattern for. It would be pretty and not too horribly time consuming to make. Lol, the exact opposite criteria that’s appreciated by my muse!

Then, in a very stereotypical artistic hissy fit, I erased it, and drew what I wanted to draw! And here it is:

This is the first in a series of Alice in Wonderland coloring pages I intend to draw! I’d say watch for a new one coming next week – but lately I’ve been sucking at being on time with these. Haha for me the time of corona is very different than for most – I hear everyone talking about all the free time on their hands, and I think “if only!”

The next coloring page will be a woodland scene with a female Mad Hatter hosting a tea party! I’ve got it all pictured in my head – and just need to get it onto paper. 🙂

Faerie Circle Fantasy Coloring Page

The coloring page I’m sharing today is rather special (to me at least)! It shows something that’s been in my imagination for quite a while. It shows a scene I want to create in my backyard someday (when I have a yard!)

Ok – so the giant mushrooms would be impossible, unless I carved fake ones, lol! But maybe replace them with a ring of plants that are either bioluminescent (glow in the dark) or flowers that bloom at night, and we’d have my dream fairy circle spot. The spiral rocks in the circle-shaped clearing are something I could easily create. Add a standing fire pit and some seating, and we’d have both a very practical outdoor entertaining area, and the ability to remove it all for faerie ball purposes!

Someday. 🙂

This is the fourth of my first four coloring pages – and so far, they’ve all been distinctly fantasy themed! Next, I have several Alice in Wonderland ideas – one for each character – that should be fun to draw.

Fabric Face Mask Making Tutorial

I’m back (as promised) with that mask making tutorial! This is a plan for a double layer mask that fits extremely well. I’ll have some pics of myself wearing it soon. ^.^

And now… let’s just jump into it!

Materials

To make this mask, you’ll need the following:

  • A pretty outer fabric, 100% cotton
  • A soft inner fabric, 100% cotton or silk (I’m using cotton gauze, which is nice and soft against the skin)
  • 1/4” elastic – braided, NOT knit (knit elastic can be scratchy at the back of the ears)

And of course, a sewing machine and thread that matches your fabric.

Recommended Materials and Tools

These items aren’t absolutely necessary, but I recommend having them:

  • A rotary cutter and a rotary cutting mat
  • Cardstock (to print the pattern)
  • A 1/16″ scrapbooking hole punch
  • Plastic twist ties (the easiest way to do the nose wires!)
  • Antibacterial wipes (to make a removable/interchangeable filter.)

Step 1: Prepare patterns

Here are the links to both patterns, or you can view and print the images in this post.

Cut out both patterns.  Take your hole punch, and punch the outer pattern. If you don’t have a hole punch, you can use sharp scissors, and twist to make a hole. For the two spots marked by the nose, poke holes, then cut with scissors so that you have two slits to mark.

Your pattern will look just a bit different than mine in these pictures. I drafted it by hand, but cleaned it up on the computer before uploading it to my site.

Step 2: Cut out

Cut out your inner fabric.  Cut out your outer fabric pattern from your pretty fabric, and mark the dots, and the lines at the top.  You can use a fabric chalk pen, or even a washable marker will work for this step.

Cut out two strips of elastic, as follows, depending on which size mask you wish to make:

  • 7″ – XS
  • 7.5″ – S
  • 8″ – M
  • 8.5″ – L
  • 9″ – XL

I find that most women wear S or M, and men wear M-XL.

Step 3: Sew nose area

Take your outer fabric, fold in half, and sew the nose seam.  You’ll be sewing from marked line to marked dot in this step.  This helps get the nose portion at a more exact angle.

Take your inner fabric, and fold along the top at 1/8″, twice.  Pin, and sew.  

Open up the nose seam, and press it flat.

Step 4: Chin Darts.

Lay your fabric pieces on top of eachother, right sides out, like so:

Fold the inner fabric so that the first chin dart touches itself, and you can just see the dot you made on the outer fabric.  Fold the outer fabric along the same line in the opposite direction, and pin.  

Put your pin in on the outer fabric side, and pay attention to which direction you put it in, so that you can remove it while you sew!

Repeat this step on the opposite side.

Sew both of these seams – lining up at the 3/8” point on your sewing machine.  I did smaller selvage than the standard 5/8”, to keep the finished mask from being too bulky.  When you’re done, fold the fabric back out again, and topstitch them, like this:

Step 5: Cheek Darts

Repeat Step 4, but with the cheek darts this time, folding first the inner, then the outer fabrics down so that the darts touch, and pinning them, like so:

Sew them, and again topstitch them:

Step 6:  Bottom Edge

Fold at 1/4 inch twice, and then pin the bottom edge of the mask.  Pin the center first, and then the outer edges.  (The resulting seam will be straighter that way.)

I don’t yet have pictures of this step.  I found out that my husband had to wear a mask to his job before I was finished with my first batch of masks, so I had to hurry thru this step and forgot to take photos!  I will do so next time I make them.  🙂

Step 7: Top Edge

The top edge is done just like the bottom, but it’s a bit trickier.  You’ll need to center the twist tie over the nose seam, and pin it in place, starting at the center.  Then when you sew, you’ll need to really muscle it into place to prevent it from sliding out from under the foot while you sew.  If you have a spring action guide foot for your sewing machine (it’s a foot that’s designed to sew things that are really thick on one side, and really thin on the other side) this will make it easy, but that’s kind of a specialty item!  You can do this step with a regular foot by going really slowly and carefully.

(Again, no pictures. I will fix this soon!)

When you have both top and bottom complete, your finished mask will look like this:

There’s a gap between the outer and inner fabric at the nose. This is to create a pocket where you can add a filter. To create your own antibacterial filters – get a pack of skin safe antibacterial wipes. Dry them out, cut them to 4″ x 3.5″ and insert them in the pocket. The wipe will peek out just a tad over your inner fabric, which makes it easier to exchange.

Step 8: Elastic

Next step is to attach the elastic.  To do this, pin it 1/4” from the edge like so:

If you have a serger, the next step is super easy!  Serge both sides, attaching the elastic, and finishing the edge.  Fold your serged seam in, tucking the string ends, and pin like this:

Then sew it down:

Or without a serger, you’ll pin the elastic exactly as shown above, but instead of serging, the next step is to first sew, then zigzag stitch the elastic, as shown in this sketch:

Fold the edges down twice at 1/4”, and pin, and sew.

And your mask is complete!

Aaaand finally, great news for those who aren’t interested in sewing any masks – I’m offering these for sale:

They’re very limited, since I can only make a few of them here and there when time allows.  I try to make a few each weekend – so if you click the link but it’s sold out, I’ll be restocking soon.

Fabric Face Masks – Pattern and Tutorial

This is the story of my life: I start a sewing project, plan for how long I believe it will take me, and it takes 3-5 times longer than I expect!

So although I promised via social media to post that mask making tutorial on Sunday, it’s now Monday, and I’m exactly this far on the first batch of masks:

They aren’t quite wearable yet! And since I’m taking pictures while I’m sewing them, that means the tutorial also isn’t quite ready yet.

But I thought I’d get started by posting the pattern and some basic instructions. Real tutorial coming next week!

I made this mask pattern myself. I didn’t intend to – I figured there would be a perfectly acceptable mask pattern online. I even downloaded a couple, and was like – no this isn’t going to fit, no that’s not gonna fit. LOL, who would’ve guessed, I’m too picky to use patterns made by other people. 😛

My pattern is completely unique in that the fit portion is done with darts. There are two darts for the chin, one dark for each cheek, and a dart over the nose. If you do a wire over the nose, there is literally zero gap anywhere with this mask, which is typically the biggest safety problem with homemade masks.

And I feel I should insert the obligatory disclaimer – this is not a medical mask, and it won’t protect from coronavirus like an N95 mask does. However, if you just want something to wear to the store, this style should work absolutely perfect for you.

To troubleshoot my pattern, I made a batch of 10 of them and had my husband hand them out at work and instructed him to have people try them on, then have every member of their family try them on. The pattern I’m sharing below will fit older teenager to adult. To adjust to fit larger or smaller within those ranges, you only need to lengthen/shorten the straps.

Here are the pattern pieces:

I included a box around the actual mask pattern so you can make sure your printer is printing the correct size! The box should be 8 x 10 inches.

If you’re an experienced seamstress, you might be able to make these just from this pattern. For everyone else, there will be a real tutorial coming this weekend!

Sassy in Red Saloon Girl Costume

It just so happens that my designs make the best stinking saloon girl costume… ever! 😉

Red Victorian Saloon Girl Costume

But getting saloon girl photos is rather difficult. I love outdoor photo spots, and there’s nothing near me that looks Wild West! Here in New England, we’ve got a ton of amazing natural scenery. There are spots that are perfect for woodland fantasy, nearly every historical era (while we don’t have in actual historical castles, we have reproductions!), amazingly creepy Halloween spots, gorgeous gardens, and more! But deserts and that wind-and-sun-weathered ghost town look is something you don’t really find out here.

Victorian Saloon Girl Costume
Saloon Girl Bustle Dress

These photos are snapped at Wilcox Park in Westerly RI. There’s a cute caretaker’s cottage there with a front porch that’s painted brick red. It’s way too much lush green for a true Victorian Wild West look – but I had to work with what I had!

Victorian Saloon Girl Costume

And the weathered boards beneath my feet and the painted Victorian-era wooden porch at least look saloon-ish. 🙂

Saloon Girl Fascinator Closeup

Usually I’m wearing my sister’s jewelry – but this time, we failed to coordinate before the shoot. So I whipped up this choker necklace with some hat and crown making supplies I had lying around. It was safety pinned together behind my neck! I think I’m going to turn it into an amazing cloak fastening later this year. ^.^

And here’s my absolute favorite photo of the day – totally getting into character in this shot!

Sassy Red Saloon Girl Costume

This set is going to be one of my first designs that I can offer in all sizes – including plus sizes! I started a big batch of the skirts just before everything went crazy – and I had to prioritize everything else in life. Once things slow down, I hope to be able to complete them and add them into my store. There’s also just one left from the previous batch (a size Medium) in my Etsy shop.

Unicorn and Elven Lady Coloring Page

For this weeks coloring page, I again sat down with sketchpad, pencil, and pens and let my imagination take me where it wanted. I wound up with this Elven Lady and unicorn!

Unicorns are my sisters favorite. I told her that was what the coloring page is going to be this week and her response was “OK, where is it? Hurry up and finish it already!”

When I went to draw this, I realized – wow, it’s been at least 15 years since I’ve drawn a horse. And I was picky about the exact direction and pose of my unicorn. So I had look up about 14 horses on Google images, and use them all to figure out how to draw the horse in this exact position! I’m quite happy with how Franken-unicorn turned out. 😉

Here is the printable coloring page:

Made-To-Order Information Am I out of your size, or do you need a size other than what's listed? If you catch me at the right time, I offer this item made-to-order! It's not available made-to-order right now, but enter your email below, and I'll reach out to you when it is: